IMPACT Tekla Base Tools
Introduction
Tekla Base Tools is a software that transfers data from Tekla Structures to IMPACT, including element properties and geometry. This allows the elements from the Tekla Project to be planned in IMPACT Production. If you would like to know more about the possibilities of transferring data into IMPACT for planning, then visit our website: https://strusoft.com/products/impact
User Interface
Possible to search, group and categorize entire projects in a similar manner to our other applications.

Cast-Unit/Assembly orientated
The application will actively search for Objects Parent Assembly or Cast-Units when linking data from Tekla. Preferably, you select everything as Assemblies. By doing that, TBT (Tekla Base Tools) will no longer need to do so much guesswork and it also allows us to reach data in Tekla which was previously not available to us.
Workflow

The workflow is linear and contains three steps.
Link
When a Tekla object is linked to TBT, it will be tracked by the software as it used to.
Map
Choose an IMPACT definition to represent your Tekla asembly/object.
Save
This command interprets, converts and saves data to the IMPACT database.
Ribbon Commands
Linking

In order to link elements, press the Linking icon in the ribbon. Always remember to have selected the assemblies that you want to Link from Tekla. When pressing Link, the following window will pop up.

The highlighted window from above illustrates where the selected elements will be assigned on Floor, Building, and Phase in IMPACT.

The highlighted window above gives you the possibility to predefine the building, floor and phase for your assemblies in Tekla with the use of a UDA (User Defined Attribute). TBT then reads the UDA and translates that into IMPACT information. The function "read from UDA" overwrites the default values. It is important to make sure that you have predefined the same Tekla values for building, floor and phase also in the IMPACT Project Manager

The highlighted grid above allows you to preview the Tekla items that you are about to link into IMPACT. The new interface allows to remove unwanted items easily by right-clicking and removing them along with their corresponding groups (if necessary).

If you accidentally erased some of the items in the Tekla, then the command "Retake Tekla selection" will refresh the grid with the selected items from Tekla Structures. When you are sure that all the correct items are left on the grid, then select the command "Link" in order to finish with the first step.
Mapping
There are two ways of mapping components in the new Tekla Base Tools and a new way of mapping element marks. Mapping refers to what definition item X in Tekla should be represented as in IMPACT.

Automatic Mapping

Automatic profile mapping is very simple. All the linked profiles in your project will show up in the middle grid. The Profile name is controlled through the first General setting in the Settings grid (explained further down in the article). Select your profiles from the middle grid, and then select the IMPACT definition that you want from the grid on the right. Simply click the Assign Selected button to complete the mapping.
You can even save the mapping for later use by saving the mapping to a common mapping. The common mapping is saved per computer and can be used in all TBT projects, as long as your Tekla Profile is consistent.
P.S. Click inside any of the grids and press CTRL + F to search. Tip: You can freely search in almost all grids across the software using CTRL + F.
Element Mapping

Items are normally given IMPACT element marks that match the Tekla assembly/profile name, when they are saved to the IMPACT database. You can override this by manually assigning element marks. This is a requirement if you want to use manual component mappings. The reason is that if you don’t, you may have items overriding each other’s element data, and you do not want that. It is a built-in safety.
The command can also be found by right-clicking on an element on the grid.
Component Mapping

For items with manual element marks it is possible to assign a specific IMPACT definition (such as linked, hollow core, solid wall, etc.) that is overriding the automatic profile mapping. Use this if you have multiple objects with the same profile in Tekla but you want them to be represented by two different definitions in IMPACT.
The command can also be found by right-clicking on an element on the grid.
Saving

Saves items to IMPACT. You can either save the selected elements on the grid or simply Save all.

You can always right-click on an element on the grid and then simply press "Save Selected"
Updating

Use this command to check for changes in Tekla and IMPACT.
Refresh does not check for any updates, it just rereads data into the main grid. Users of the Project Manager will recognize this feature.
Other


The Other button shows the About dialogue box, with build and version numbers. If you call our support, they will kindly ask you to show them this.
The Settings dialogue box will be explained further below in this guide.
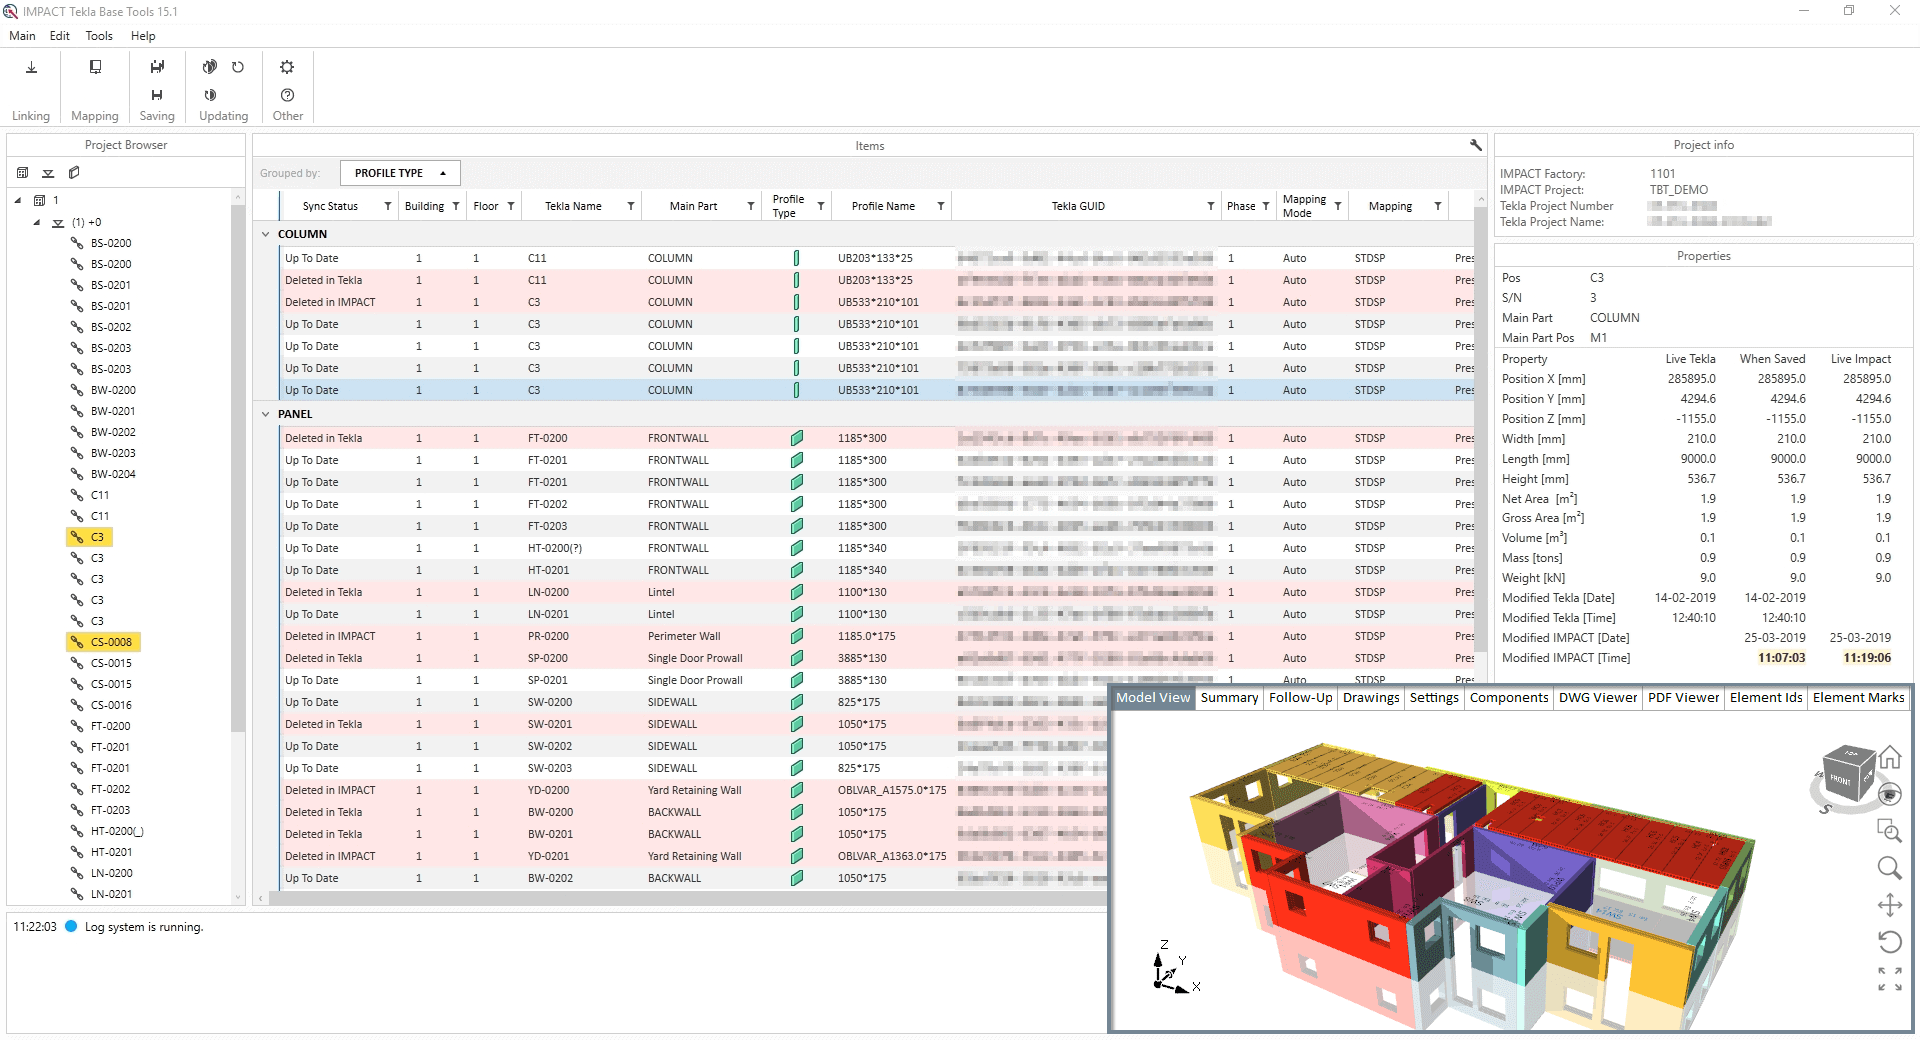
Data Grid
Remember to adjust the grid by filtering or dragging the tabs on the top of the menu.

Remember to also explore the context menu by right-clicking in the grid to access additional features.
Sync Status
The Sync Status can vary during the process of creating/editing a model in Tekla. All the possible statuses are explained in the following table.
Up to Date | The item is up to date |
New/Updated | Item was either newly linked/re-linked or the object was updated with new information |
Modified in IMPACT | TBT detected changes in IMPACT since the item was last saved |
Modified in Tekla | TBT detected changes in the Tekla Model since the item was last saved |
Modified in Both | Displayed if both modified statuses occur at the same time |
Deleted in IMPACT | TBT could not find or contact the Sync IMPACT item. This also occurs if the IMPACT items are marked as deleted from IMPACT |
Deleted in Tekla | TBT could not find or contact the Sync Tekla item. This also occurs if the Tekla items are deleted in Tekla |
Deleted in Both | This status is displayed if both the deleted statuses occur at the same time |
Unknown | The object's current sync status could not be determined |
Data Grid Settings
You can show/hide data columns in the data grid settings dialogue. You access it by clicking the spanner icon in the upper right of the data grid. These settings are saved per computer and are remembered between sessions.


Data Grid Properties
Displays the properties of the selected item. If the item contains changes, these are shown in bold text with a yellow colour patch. Note that the new system also accounts for Teklas object and IMPACT model history. This way you can detect changes even if they are not part of the standard comparison set.
Teklas History is a live value, but if you modify the Tekla model without saving it, the Tekla History will not be updated. Thus, you may see at times that the properties differ, even if the modified time remains the same.

Menu Commands
Main

Opens the folder in which all TBT project files, backups and logs are stored.
Edit

Settings - General
In general, a description of each command can be found by hovering the mouse cursor over the 
The picture below represents the recommended settings that the Tekla Base tools PO (Product Owner) proposes to all the new users of TBT.

Settings - CIM
When selecting the "Object" Setting, then the name of the CIM from Tekla will be imported in IMPACT.
When selecting the "UDA" Setting, then the user decides which value will be imported in IMPACT as the name of the CIM.

To read in the lifts in the import you need to tick Save Part as CIM and write the start of the name.

To read in the core fillings the elements needs to be defined as Hollowcore (linked elements will not work).

For it to come in correct the section definitions for the Hollowcore needs to have the correct core location in IMPACT.
Settings - Reinforcement
There are different settings that fit different companies regarding the reinforcement import from Tekla in IMPACT. You can always test which settings are relevant for your company along with a specialist from our IMPACT team.
The below settings are recommended by the TBT PO for a first-time user of TBT.

Settings - Sandwich Wall Volume
This allows the user to map the inner-, insulation- and outer panel volume via custom properties in Tekla. By mapping the correct volume for Sandwich walls, the user ensures that it is the right values exist in the Cost estimation tools also.

Settings - File transfer
It is possible to transfer files from Tekla - directly into IMPACT.

Configure Name conventions for drawings and/or PXML. - It is possible to configure the naming of the files using the configurator. The naming convention rules that the user will select need to be followed by the .pdf/.pxml file generated from the Tekla model.

For example, if we have selected the element mark as the only factor for the drawing name, and the element mark is SW1, then the file that represents the drawing of the assembly SW1 in Tekla should be named SW1.pdf and the RC file SW1.pxml.
For the time being, only PDF and pXML files are allowed to be imported into IMPACT. Look out for updates in the future.
Settings - Status transfer
It is possible to transfer a Tekla Element "Status" from a UDA into IMPACT. It is even possible to select if a status should also mark the element in IMPACT as "Ready for production"

Settings - Plinths
This setting has been created specifically for only 1 customer and it is not relevant for anybody else. Therefore, please keep both boxes unmarked at all times, as shown in the picture below. If you do not follow that, then the results will overwrite existing TBT functionality, leading to incorrect properties and element marks!

Tools

These execute the same commands as described in the Ribbon commands chapter.

The backup command creates a backup, which will be stored inside your Tekla model folder.

You can, of course, reset a Tekla Base Tools project. Do this only if you are sure that you will need this project connection again. This command is irreversible.
Please note that resetting the project ONLY affects the Tekla <-> IMPACT connection. It will not touch either your Tekla or IMPACT project. This command will give a second warning before It executes. Once committed, it will wipe the TBT project and restart itself, allowing you to start from scratch.
P.S. If you keep the same GUID in Tekla and start linking your elements from scratch, the mapping will come back, as it is dependent on the Tekla GUID.
Help

"IMPACT Wiki" Takes you to the online wiki page with information on all the IMPACT modules.
"IMPACT Support" Takes you to our online support page with telephone numbers and email addresses of our different support divisions. If you want support for Tekla Base Tools, call or email to IMPACT support.
"About" Opens a tab where you can see version information as well as supported Tekla versions.